前言
文章中的演示上传的并非npm官网仓库,只是npm源不同而已。
准备ui库项目
创建项目
使用vue-cli准备一个vue项目进行改造,创建项目过程不在演示 vue create xxx
修改依赖
创建完成后,我们将package.json生产时依赖改到开发时依赖(因为我们是开发库文件,不应该将vue等打包到库项目中),然后重新安装依赖,重新安装依赖前,个人删除了node_modules文件夹与npm锁定文件package.lock.json。

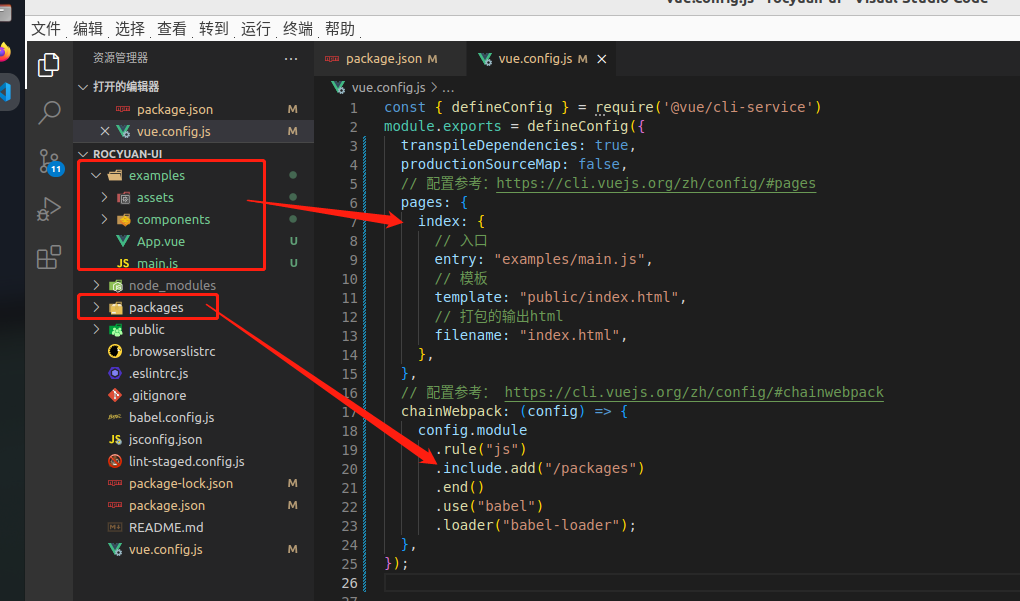
目录修改与vue脚手架配置
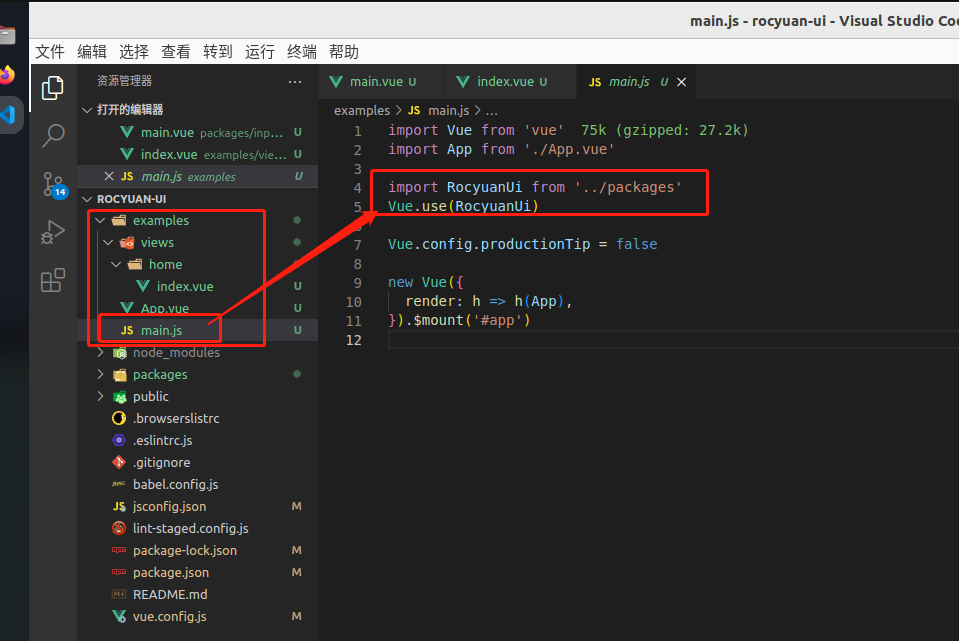
默认情况下vue-cli创建项目入口目录是src,我们参考element-ui目录结构,将src更改为examples作为项目演示目录。再新建目录packages作为库文件组件存放目录。
1
2
3
4
5
6
7
8
9
10
11
12
13
14
15
16
17
18
19
20
21
22
23
24
25
| module.exports = defineConfig({
transpileDependencies: true,
productionSourceMap: false,
pages: {
index: {
entry: "examples/main.js",
template: "public/index.html",
filename: "index.html",
},
},
chainWebpack: (config) => {
config.module
.rule("js")
.include.add("/packages")
.end()
.use("babel")
.loader("babel-loader");
},
});
|
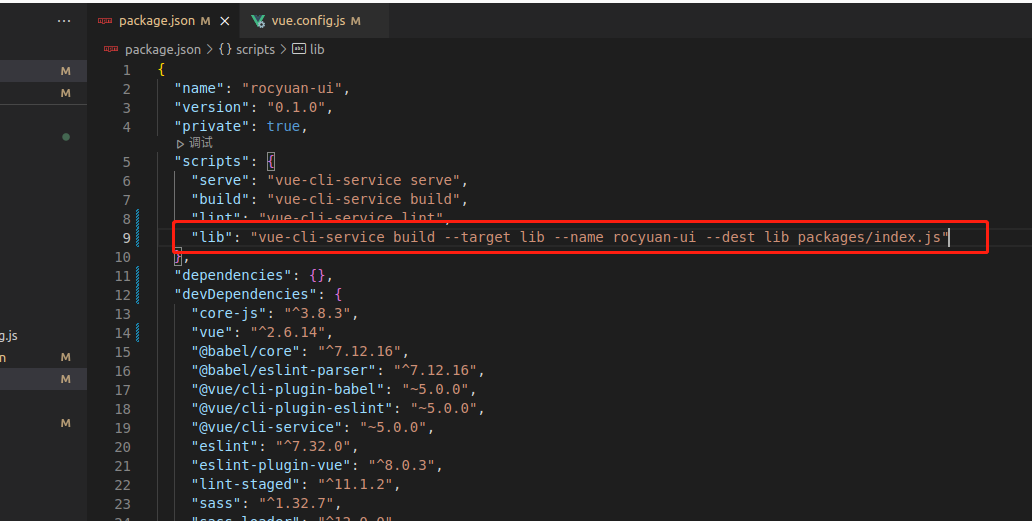
配置脚本构建目标
参考:https://cli.vuejs.org/zh/guide/build-targets.html
vue-cli默认构建目标是应用,需要修改为库,--target lib指定为构建为库,--name rocyuan-ui指定名字,--dest lib指定构建完的目录,packages/index.js指定构建入口,稍后开发完组件运行这个脚本
1
2
3
| {
"lib": "vue-cli-service build --target lib --name rocyuan-ui --dest lib packages/index.js"
}
|
开始写组件
组件目录划分
例如写一个input组件,目录结构及写法借鉴element-ui
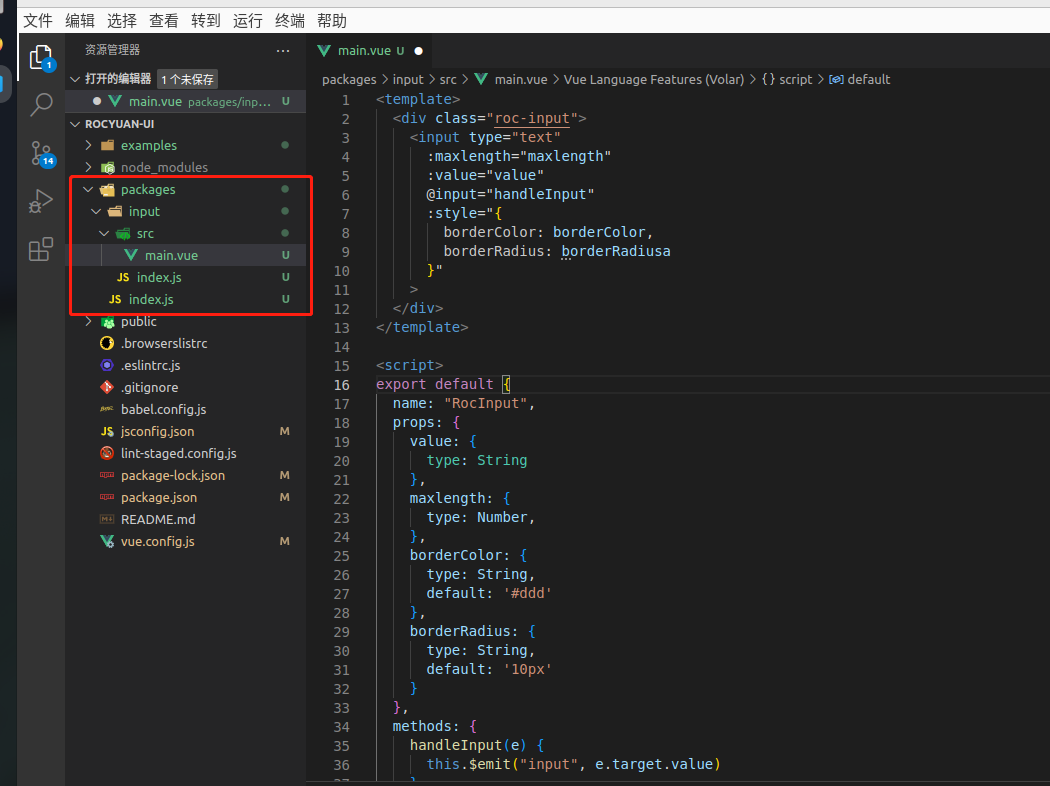
在packages目录创建index.js入口,创建input目录,其他组件则创建其他组件的目录,组件目录分index.js入口文件与src目录组件封装源文件目录
组件代码
packages/index.js
1
2
3
4
5
6
7
8
9
10
11
12
13
14
15
16
17
18
19
| import RocInput from "./input";
const components = [RocInput];
const install = (Vue) => {
if (install.installed) return;
install.installed = true
components.map((component) => Vue.component(component.name, component));
};
if (typeof window !== "undefined" && window.Vue) {
install(window.Vue);
}
export default {
install,
...components,
};
|
packages/input/index.js
1
2
3
4
5
6
7
| import Button from "./src/main";
Button.install = (Vue) => {
Vue.component(Button.name, Button);
};
export default Button;
|
packages/input/src/main.vue
1
2
3
4
5
6
7
8
9
10
11
12
13
14
15
16
17
18
19
20
21
22
23
24
25
26
27
28
29
30
31
32
33
34
35
36
37
38
39
40
41
42
43
44
45
46
47
48
49
50
51
| <template>
<div class="roc-input">
<input type="text"
:maxlength="maxlength"
:value="value"
@input="handleInput"
:style="{
borderColor: borderColor,
borderRadius: borderRadius
}"
>
</div>
</template>
<script>
export default {
name: "RocInput",
props: {
value: {
type: String
},
maxlength: {
type: Number,
},
borderColor: {
type: String,
default: '#ddd'
},
borderRadius: {
type: String,
default: '20px'
}
},
methods: {
handleInput(e) {
this.$emit("input", e.target.value)
}
}
}
</script>
<style lang="scss" scoped>
.roc-input {
input {
outline: none;
padding: 5px 10px;
margin: 4px 0;
}
}
</style>
|
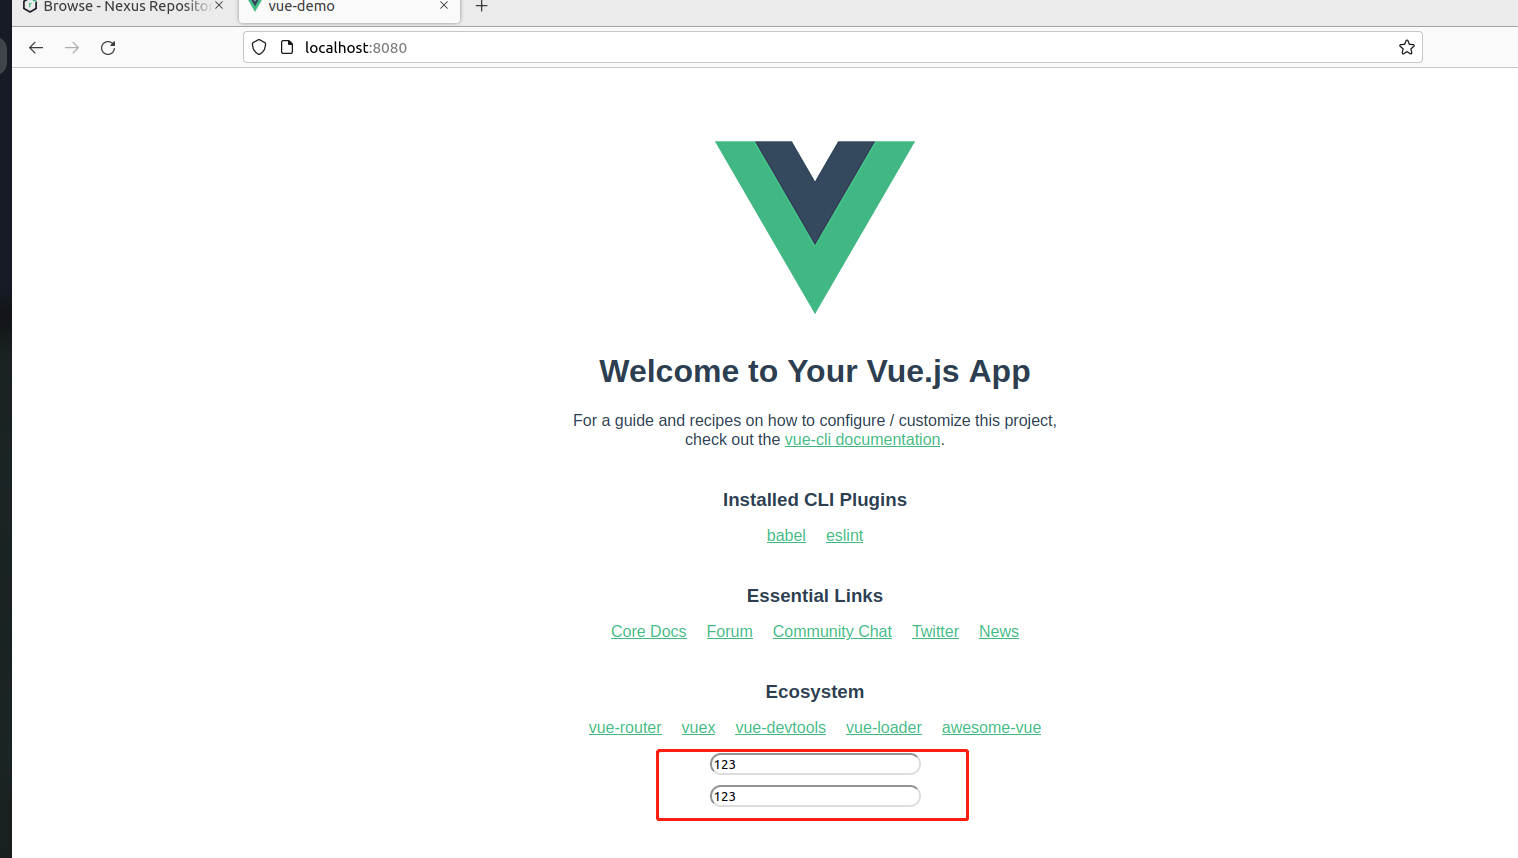
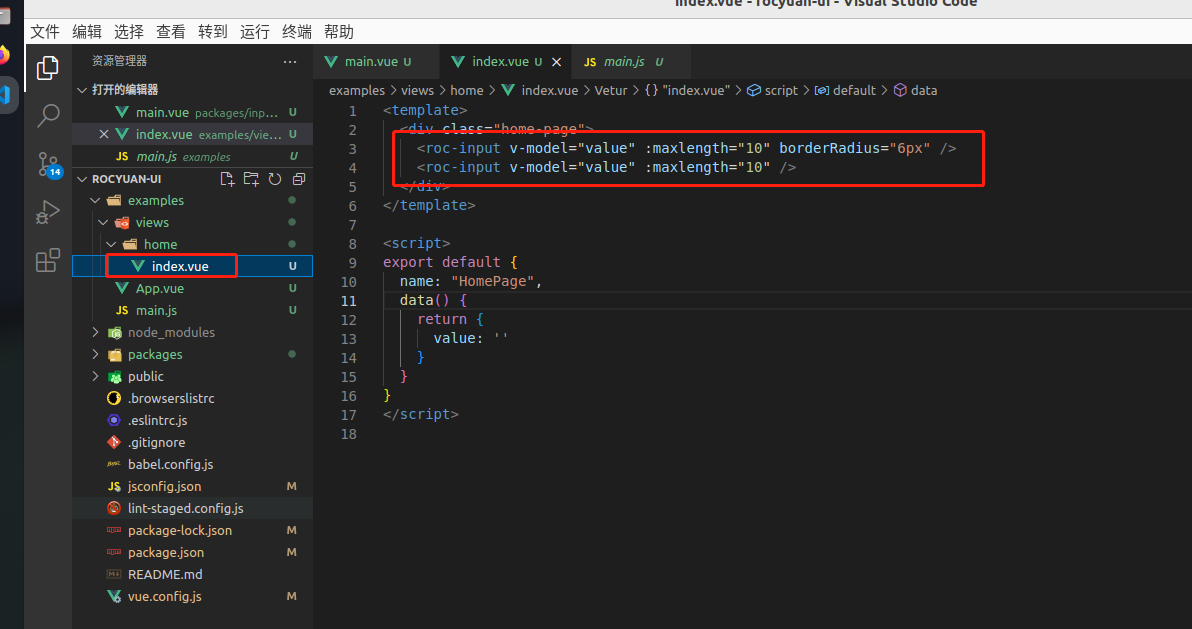
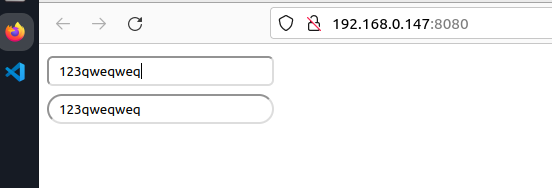
库项目中调试效果
引入packages/index.js,在examples/main.js中引入并注册,然后使用(与平时在项目中使用一致),启动项目后查看效果(必须修改上面提到的脚手架配置)npm run serve
上传npm
上传前配置
设置package.json
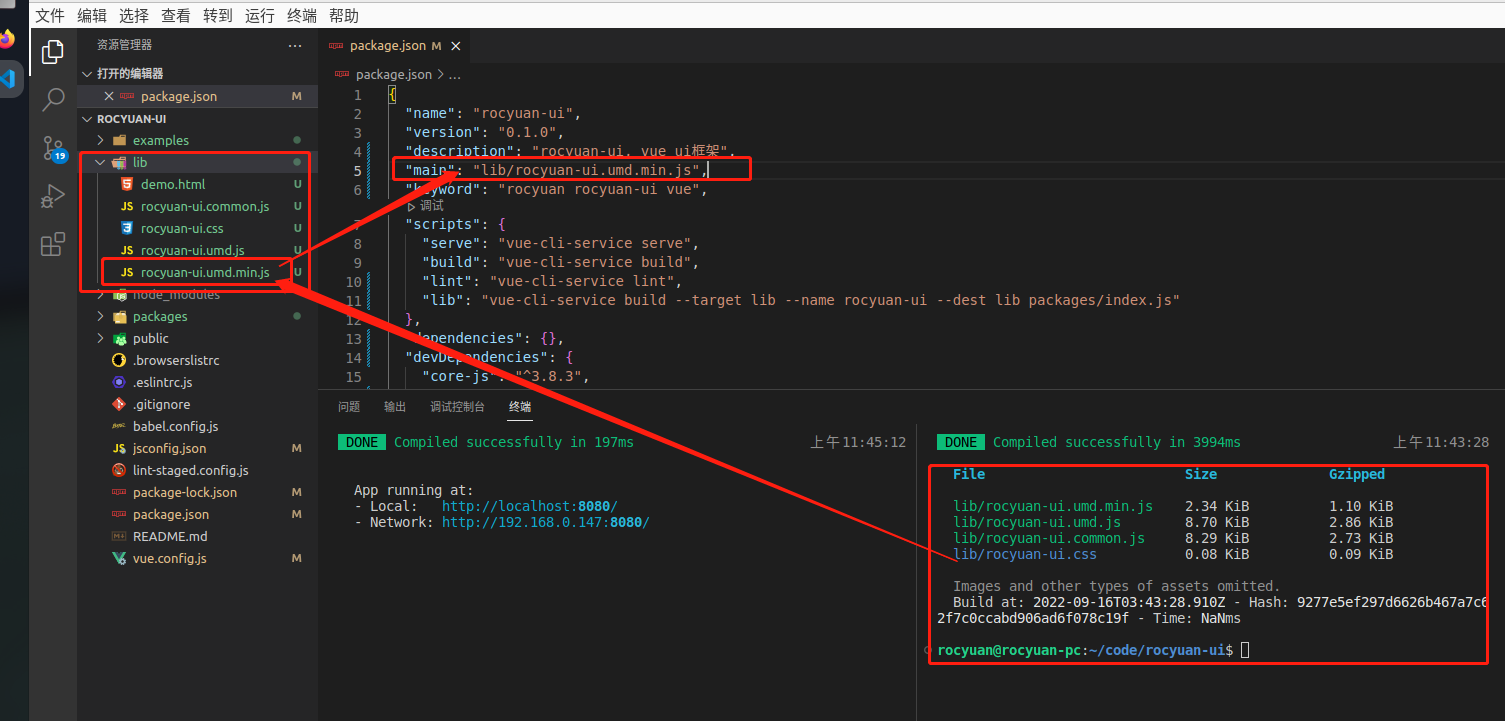
运行npm run lib后 会收件生成ui库,在lib目录,设置package.json中设置描述、关键字、及入口文件:
1
2
3
4
5
| {
"description": "roc-ui",
"main": "lib/rocyuan-ui.umd.min.js",
"keyword": "rocyuan roc-ui vue",
}
|
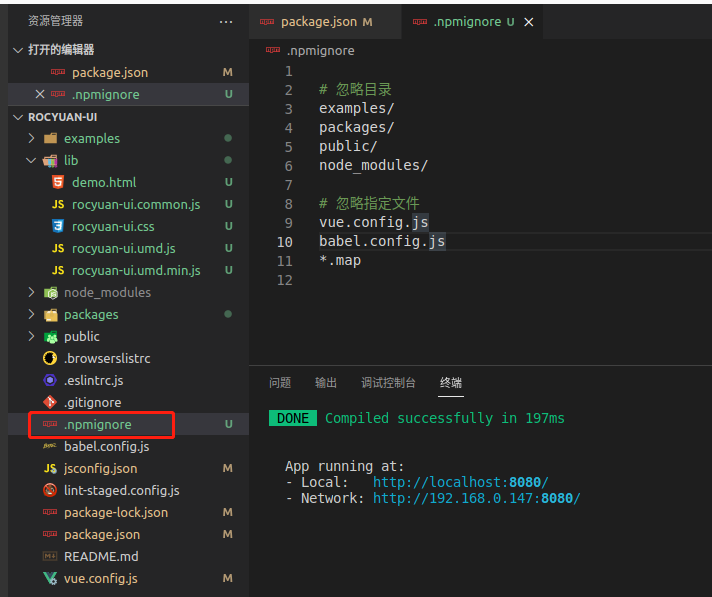
设置上传npm忽略的文件
项目根目录下创建.npmignore
1
2
3
4
5
6
7
8
9
10
11
12
|
# 忽略目录
examples/
packages/
public/
node_modules/

# 忽略指定文件
vue.config.js
babel.config.js
*.map
|
npm设置
上传前需要在命令行登陆npm(注意确保你的npm当前源是你想上传的源)查看当前源:npm get registry

我是要上传私有仓库,官方仓库源应该为:https://registry.npmjs.org/
注意:如果需要登陆、提交的源本身就是当前npm设置的源,不需要指定源 --registry http://xxxxxxxxxx
确定源后使用npm login登陆登陆成功后,可使用npm whoami查看当前登陆的账号

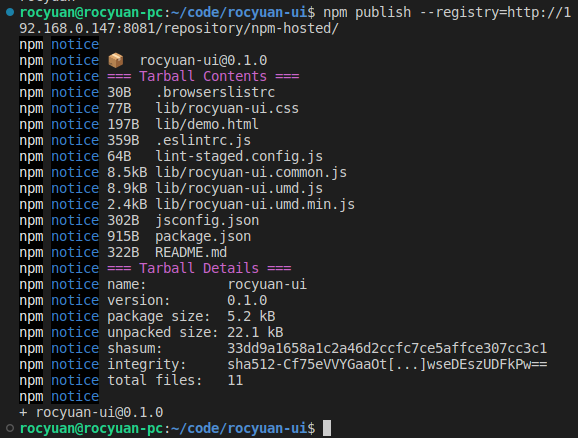
登陆成功后使用npm publish发布到npm,发布完成后如下:
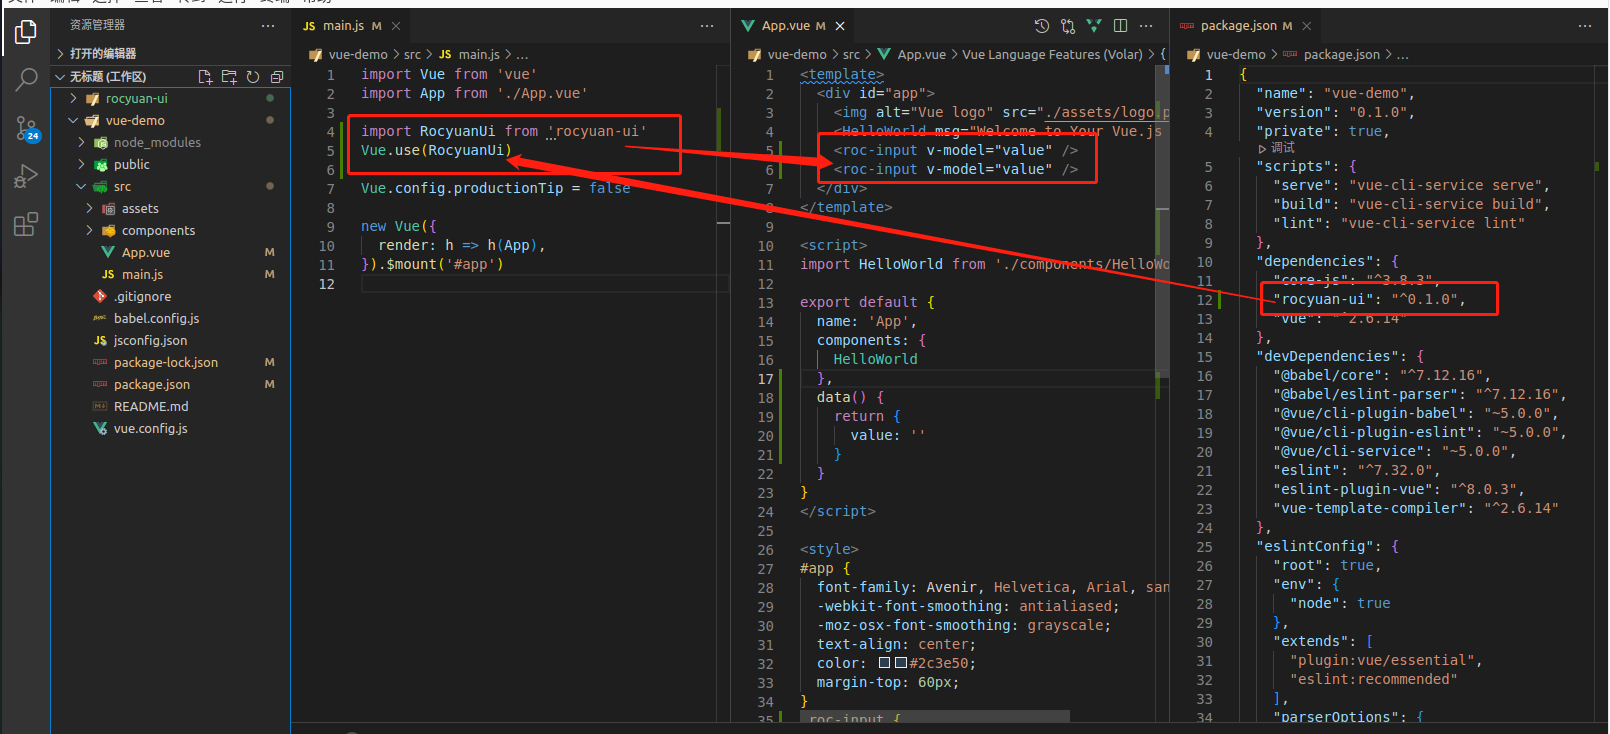
使用我们上传的ui库
创建vue项目不做演示,已创建好
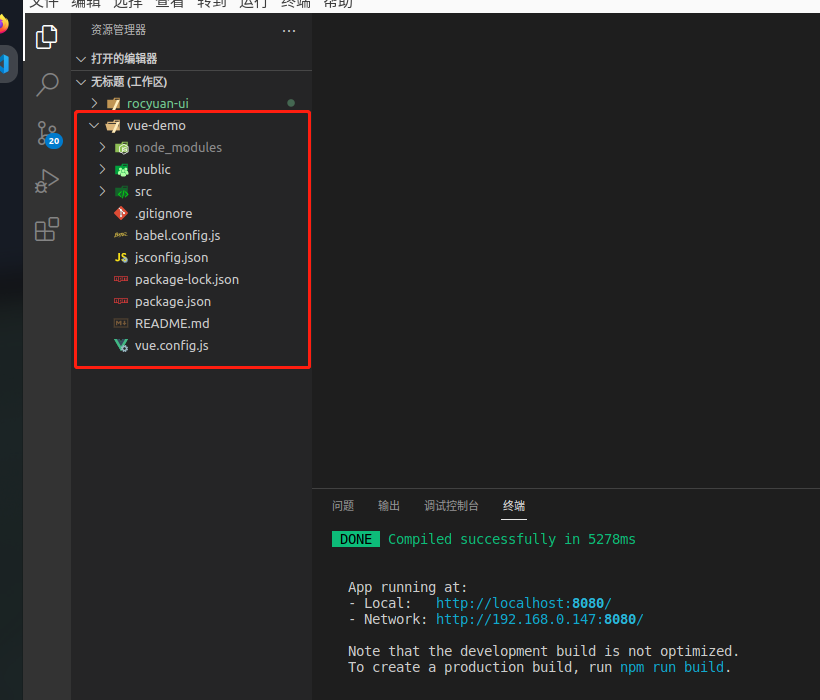
安装使用